Blockchain node – how to earn cryptocurrency on it: A guide to installation on a real project
A node is a working unit of the blockchain. It is a program on a server or device. In simple terms, a node is responsible for signing transactions and ensuring network stability. Any somewhat powerful hardware, even a laptop, can serve as a node. However, it will need to operate 24/7.
By being located in different parts of the world, nodes communicate with each other to ensure decentralization. To falsify information in the blockchain, one would need to take control of more than half of all nodes.
Mastrid fact:
To take control of the Bitcoin network, you need to capture over 7900 servers and computers of other users located around the world.
Nodes can be light (light nodes) and heavy (full nodes). The difference is that light nodes pass data through themselves, while full nodes are required to store data.
For example, a light node requires about 200 MB of space because it only passes data without storing it. A full node needs 40 GB since all data is stored on the server, which is how much it weighs. The amount of space occupied depends on the chosen blockchain.

Why set up a node
For the blockchain to function and transactions to be signed, computers are needed to handle this. This means that the owners of these devices need to be motivated to connect. Usually, this happens during the testnet phase – during the testing of the network and bug hunting before the official launch.
What is the profitability of setting up a Node?
For example, the Sui blockchain promises 5000 of its tokens for setting up a node in the test network. Recently, in October, the Aptos blockchain distributed $3000 just for applying for its setup. Not to mention the actual launch.
In this guide, we will explain what a node is in the cryptocurrency field and how to set it up.
SPOILER: The node is installed with a single line of code
Setting up a node using IronFish as an example
We will set up a node for the IronFish project. They promise a reward in their tokens for it. This is a blockchain that operates on ZK-Snarks and focuses on completely private transactions.
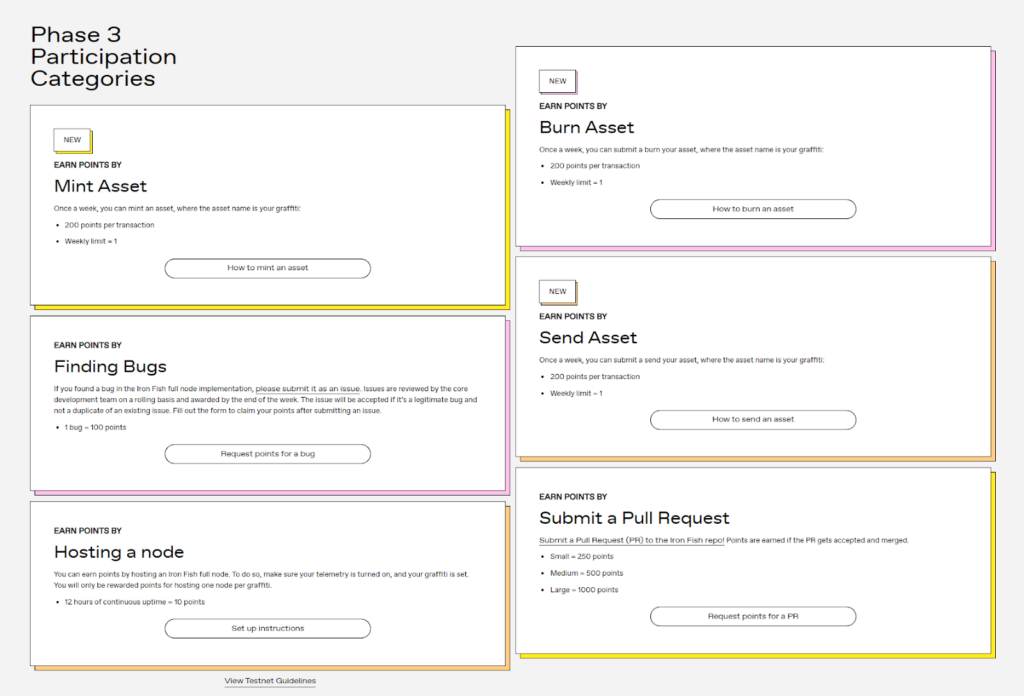
On January 18, IronFish launched the testnet. It will last for six months. We are offered to complete simple tasks for points. One of the tasks is setting up a node.
In the future, points are promised to be exchanged for project tokens.
Interesting fact:
Ironfish has attracted $32.9 million from top funds: a16z, Sequoia Capital, and Electric Capital.
The installation consists of several stages:
- Renting a server
- Installing software on it via several commands
- Updating the software approximately once a week
We will need:
- Github account (https://github.com/)
- Discord or Telegram account
Stage 1. Preparation
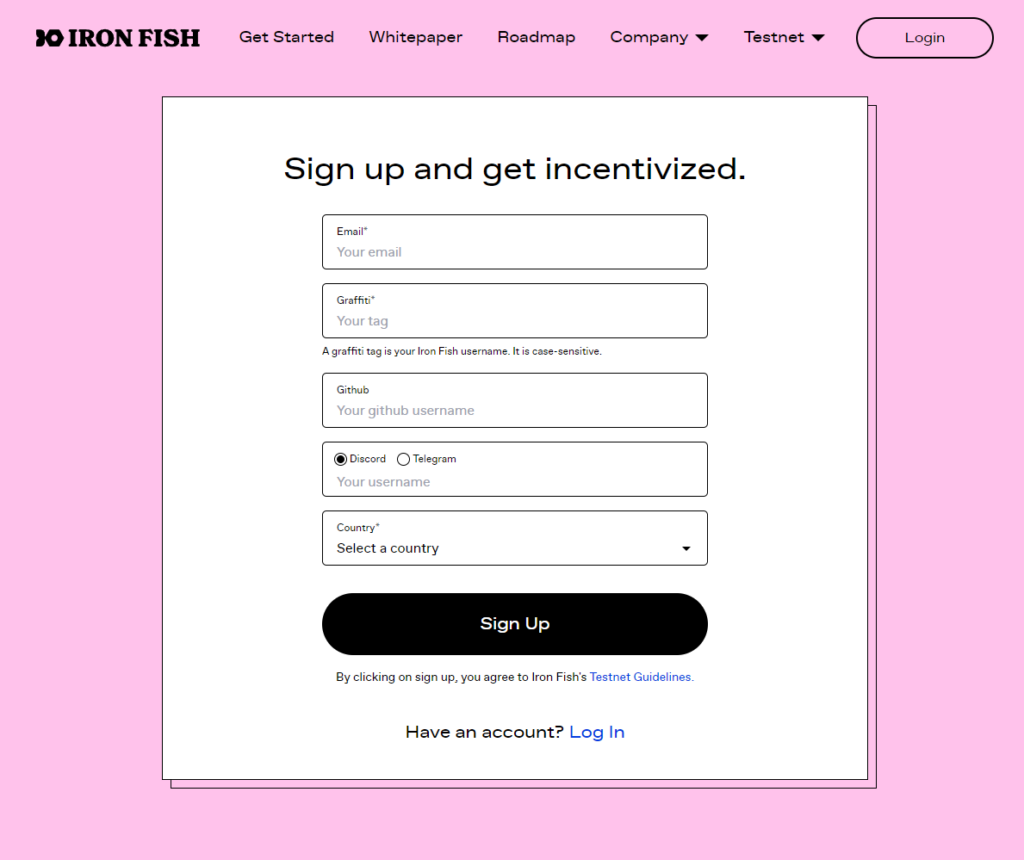
Go to the IronFish website and register. Graffiti (tag) will be used as the wallet and node name.
Stage 2. Renting a server
In the official IronFish chats, they recommend a server with the following technical specifications for the node:
- CPU 4
- RAM 8
- SSD 160 GB
- Ubuntu 20.04
Now rent a server with the necessary specifications. Personally, I use the Aeza service. It's a Russian hosting provider that offers a personal manager with prompt feedback. Not an advertisement.
When registering via this referral link, you will receive a +15% bonus to your balance. (The bonus works if you deposit within the first day)
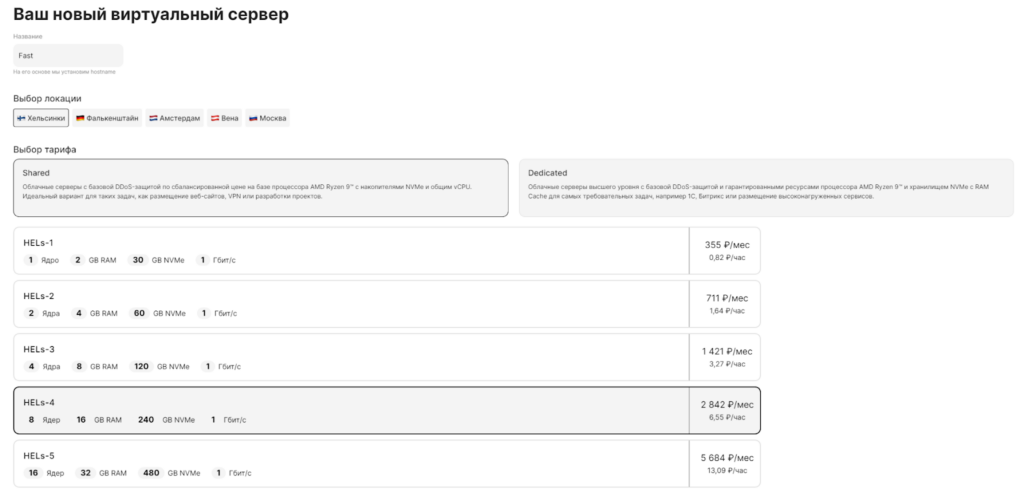
Choose Ubuntu 20.04 as the operating system. By default, 22.04 is set.
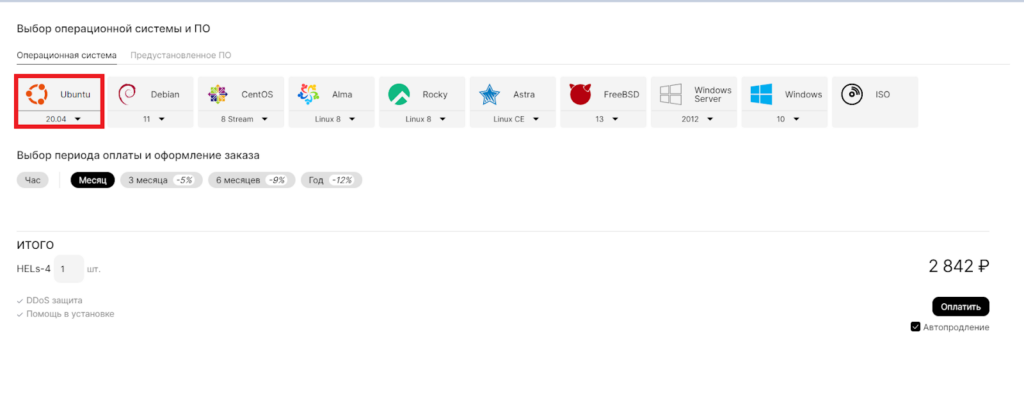
Stage 3. Working with the terminal, Starting the server, and generating access keys
Servers are managed through the terminal. It resembles a simple console for entering commands. We will use PuTTY. Let's install it.
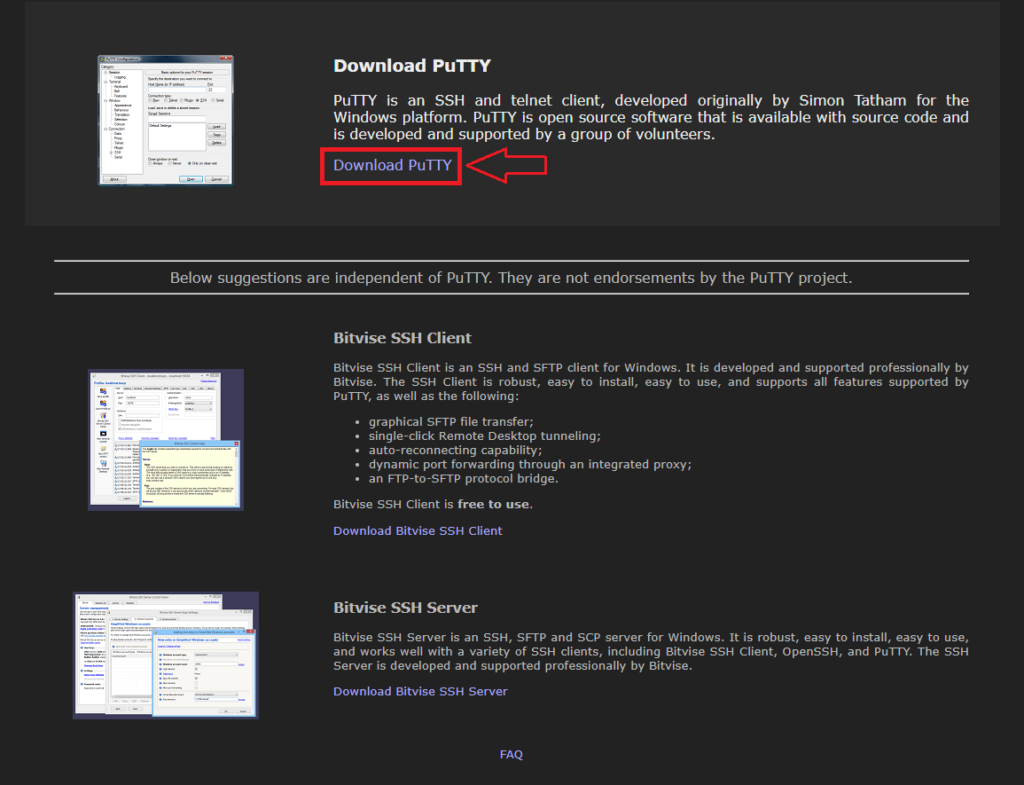
Download from the first link.
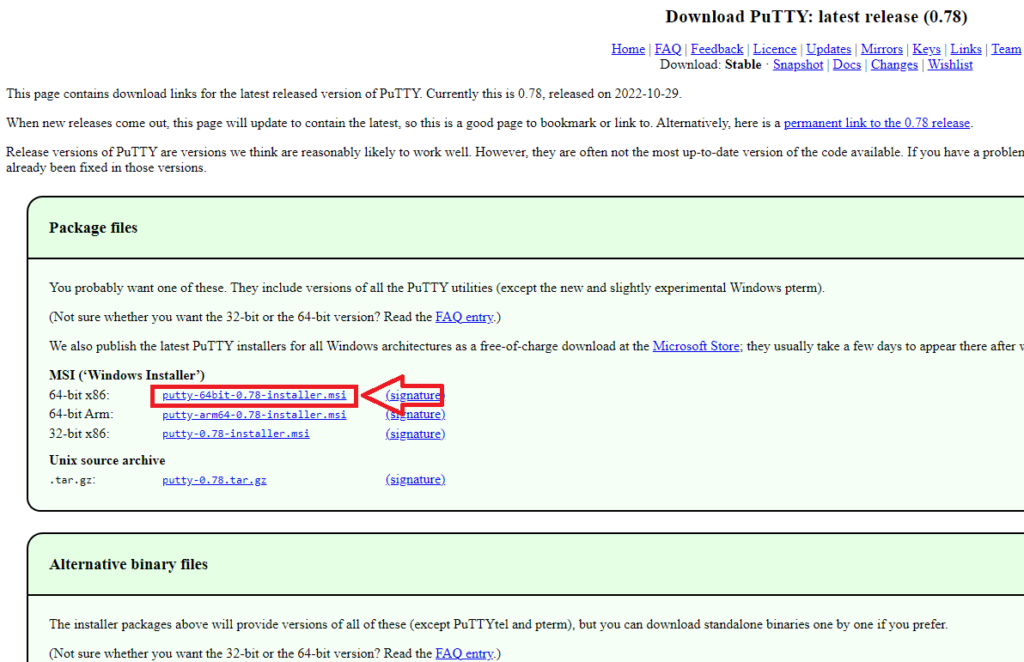
Install and open it. The interface looks like this.

Stage 4. Installing the IronFish node
Go to the page of our server and copy the IP address.
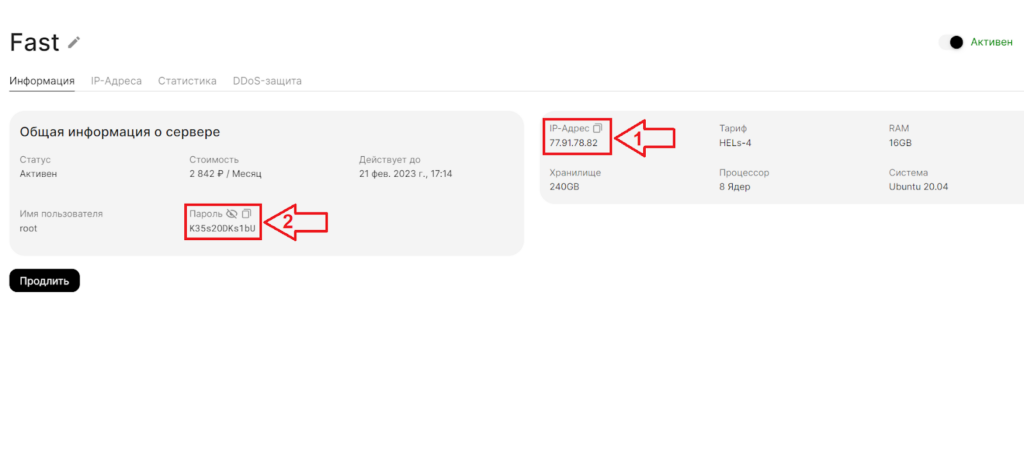
Paste the IP into the Host Name field in PuTTY, keep the settings unchanged. Copy the password from the left side of the screen. Click Open. We have accessed our server.

In the opened console, next to login as:, type root (the login)
The password in the console is invisible for security reasons. To paste it, right-click and hit enter. After a few seconds, we will be granted access to the server.

There are two ways to install the node:
- Installation according to the official guide
- Installation according to crypto community guides
The first way is usually long, as it requires entering dozens of console commands and manually installing the necessary software on the server. Therefore, we will use the second method.
The crypto communities have combined console commands and software installation into one package. So instead of a dozen commands, we will use one.
In the CIS, this is done by Nodes Guru
In the ENG space - Node Jumper
Interesting fact
You can install nodes of different projects on one server. Unfortunately, you cannot install nodes of the same project.
We will use the package from Nodes Guru.
The node is installed with one command:
wget -q -O ironfish.sh https://api.nodes.guru/ironfish.sh && chmod +x ironfish.sh && ./ironfish.sh && unalias ironfish 2>/dev/nullEnter it in the console and press Enter.
Install by sending the number 1.

Fill in the details in order, responding to the terminal's requests:
- Enter the wallet name. It should match the Ironfish tag. Mine is Fast.
- Similarly, for the node name.
- Then we will be asked for the number of CPU cores on the server. I have 8.
After that, the node installation will proceed.

When the node is being installed, a wallet for future tokens is automatically created on it. But it's not the one we need. We need to create a wallet with our tag. Enter:
ironfish wallet:create $IRONFISH_WALLETWe will be asked for the tag. Mine is Fast.

Now let's make the new wallet the default wallet:
ironfish wallet:use (Tag)
We will get the wallet address using the command:
ironfish wallet:address
The address is everything that comes after Public Key, mine is a7a281d0bc941e713d6fe8885e45ba2ecdf0e6eed64ab4c885c374b83dae81a4
Now we enable telemetry with the command: ironfish config:set enableTelemetry true
And we turn off the miner. Some hosting providers complain about it, and it's not needed in this testnet phase: service ironfishd-miner stop
The node is installed. But do not close the terminal. We will still need it.
Stage 5. Other Testnet Tasks
To earn more points, you need to complete tasks: Create, burn, and send tokens.
To do this, we will obtain test tokens for execution. There are two ways:
- Request from the faucet. Just type in the console
ironfish faucet. You will be asked for your Email. Tokens will arrive within a couple of hours.

- Beg from users. This is normal; in the Ironfish discord, there is even a corresponding section: send me iron.
Drop your Public Key (address) there
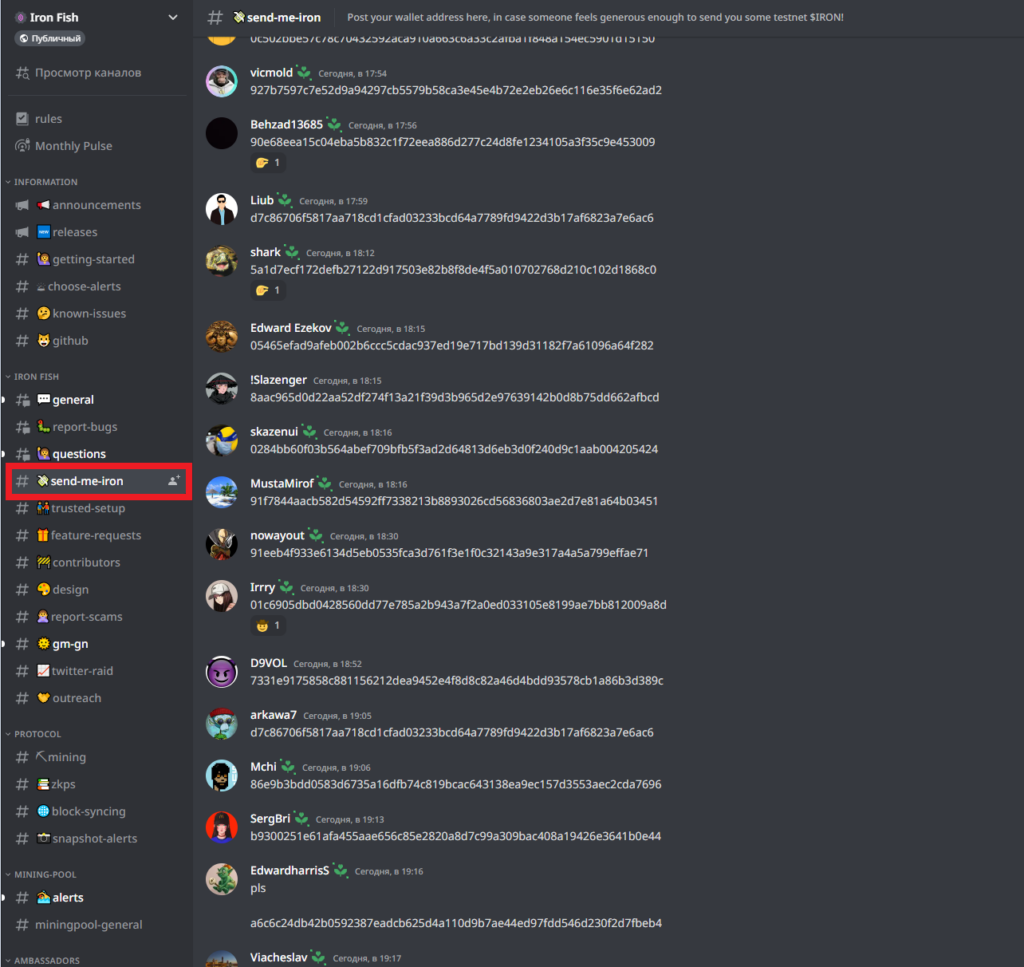
After that, wait a few hours for the transactions to go through and update the wallet balance on the server:
ironfish wallet:rescanThen you can check your balance:
ironfish wallet:balance
The talented folks from the How to node channel created a script that automatically performs the remaining testnet tasks every 4 hours: minting, sending, and burning tokens. We have modified it to make it easier to run.
If you installed the script earlier, remove the incorrectly named script:
rm mbs.sh- Download the script:
cd /root && \apt update && \
apt install wget bc -y && \
wget -O mbs.sh https://raw.githubusercontent.com/cyberomanov/ironfish-mbs/main/mbs.sh && \
chmod u+x mbs.sh - Set up crontab. It is responsible for running the script
sudo apt update && \
sudo apt install cron --reinstall && \
sudo systemctl restart cron - Open crontab with the command
crontab -e - Select 1 - this is the Nano editor
- Scroll down with the arrow keys and write UNDER the blue text:
0 */4 * * * bash /root/mbs.sh >> /root/mbs.log - Press CTRL+X, then Y, then Enter
Done. All earned points can be viewed by entering your tag in the search of the leaderboard.
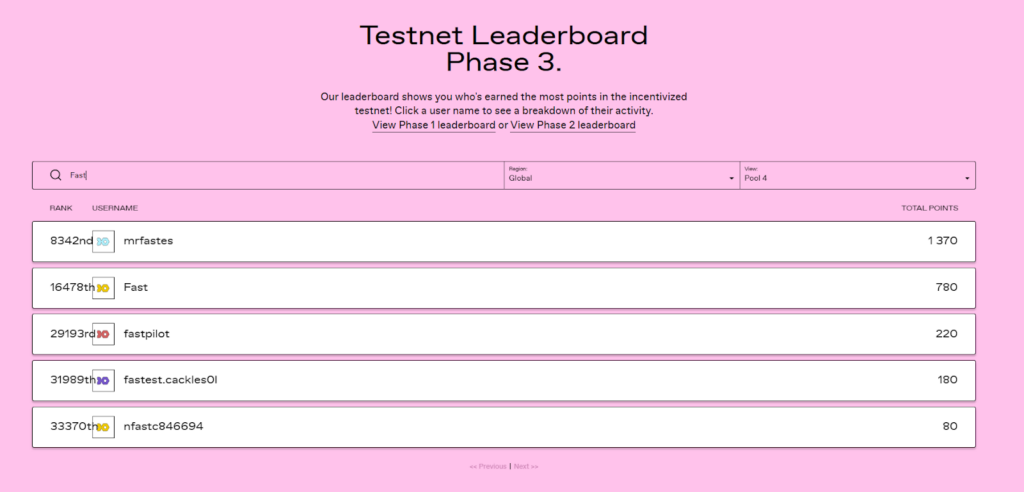
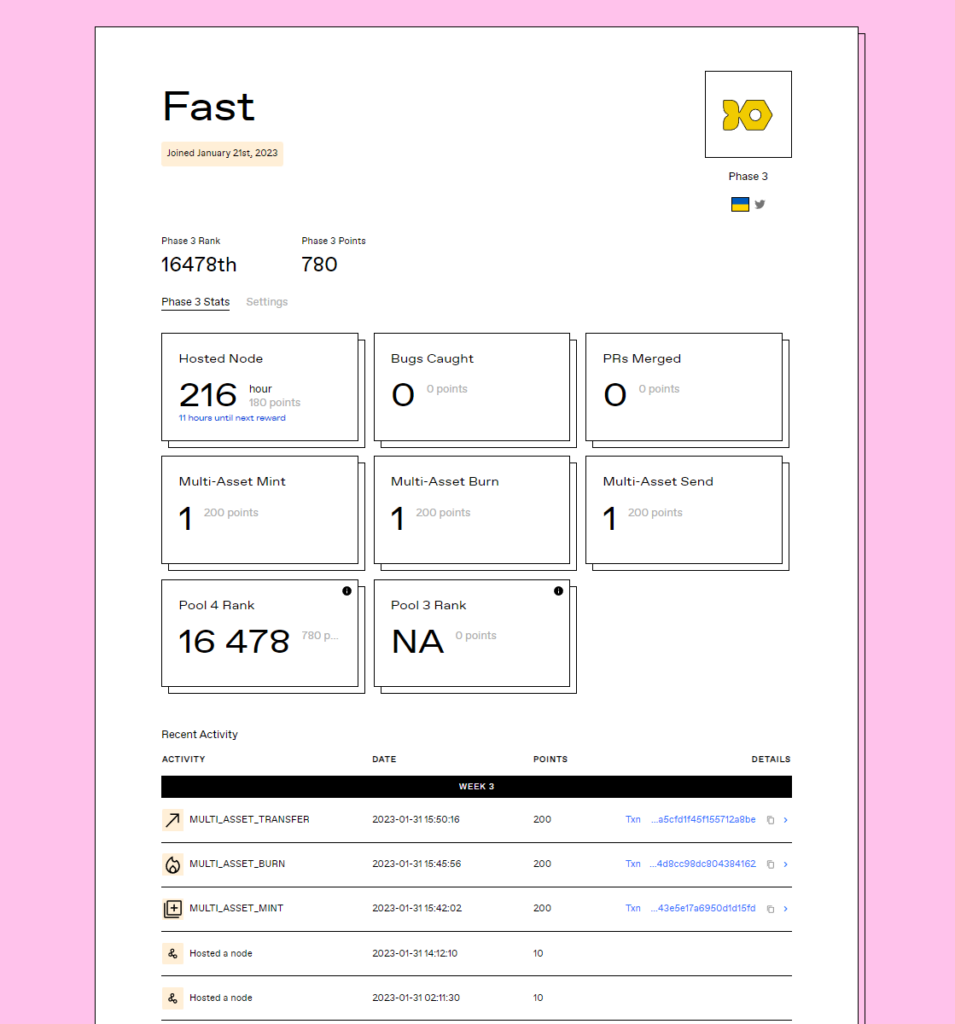
This is what my profile looks like. It states how many hours my node has been running, how many transactions I have sent, and how many points I have earned for all this.
Stage 6. Additional Commands
What to do if an update comes out
Nodes need to be updated; updates come out approximately every week.
Updates are announced in the announcement channels. Ironfish updates can be done in a few lines. Look for them here.
Some nodes require a complete reinstallation for updates. For example, SUI took about an hour.

How to check balance
With the command ironfish wallet:balance
If the balance is 0, and you definitely requested tokens from the faucet or users, first type:
ironfish wallet:rescanConclusion
This article shows how to set up a node for any project. What tools, platforms, and communities are needed for this. Where to find information.
Once you set up a node yourself, you will easily be able to set up nodes for other projects.